
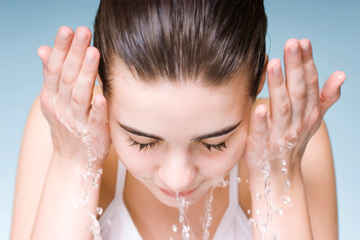
Blackheads. Gotta love them… (not). Don’t you just love exfoliating them or seeing them pulled out in your Biore’s nose pad.. and then the feeling of your smooth nose. Bliss!
I’m particularly prone to blackheads clogging up my pores, and was very curious when I heard about this best-selling blackhead removal mask set. Every product promises to do the same thing but the reviews on this one seemed to be a little more convincing.
Ladies, here’s a review of the My Scheming Ella Blackhead Removal Activated Carbon Mask Set, which you can easily purchase here for RM29.90 from Hermo.my.
They currently have a promotion where if you buy 2, you get free shipping. Took me awhile to figure out how to use this since the instructions were in korean but for the benefit of all, I’m sharing the best method I know. Here we go!
Steps to using the Blackhead Removal Mask
Step 1: Clean your face
As with any mask, before you apply, clean your skin with your cleanser and pat dry.
Step 2: Apply the bottle labelled “1” – Deep Pore Demineralised Water
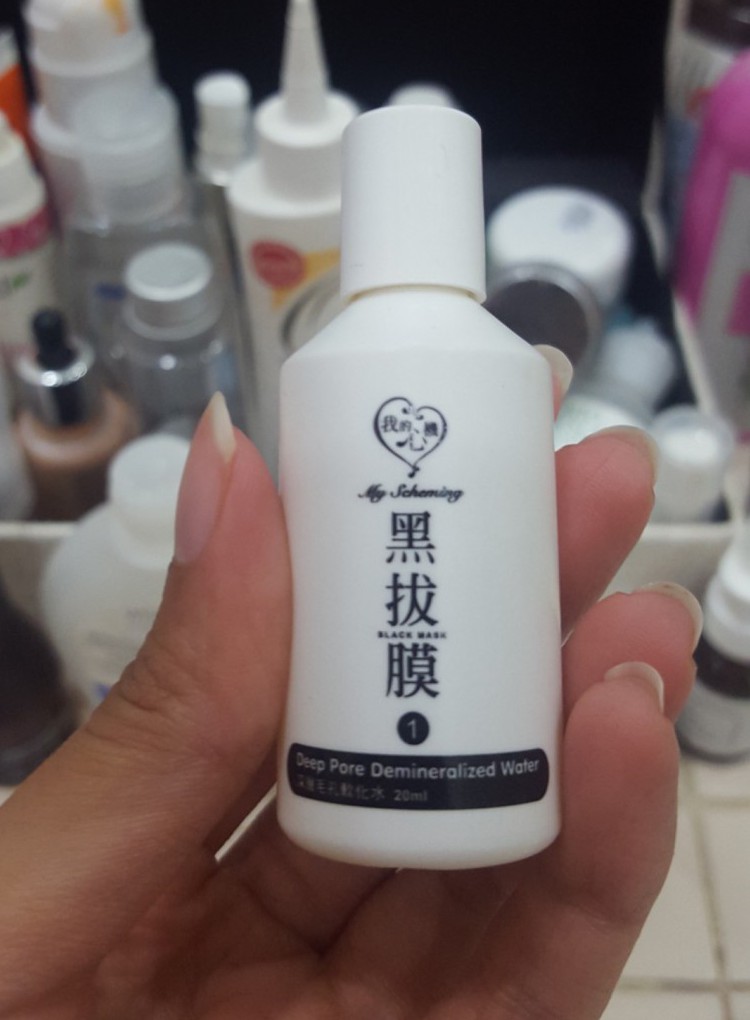
Let it dry for about 8 – 10 mins and then rinse off. This is very important. Remember to rinse it off because if you don’t, the mask doesn’t penetrate through as well. I believe this causes a reaction to the sebum stuck in your pores and encourages them to loosen up so it’s easier to pull out once you apply the mask.
Step 3: Apply the mask
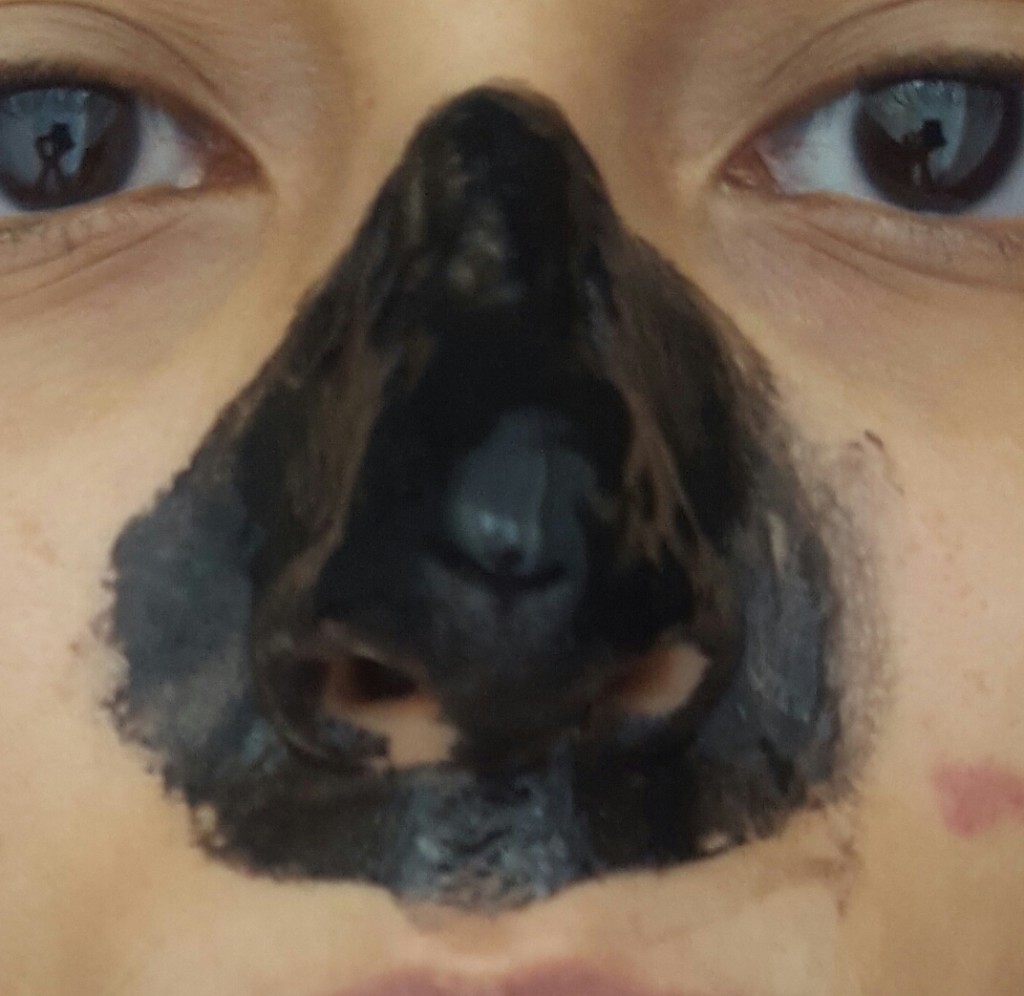
This is the fun part! Apply it evenly and ensure you apply it think enough so you don’t see your skin. This makes it easier to peel off once dry. Apply it too thin and you’ll most likely end up breaking the mask when you peel off, or it won’t pull out as many blackheads.
Step 4: Leave to dry
This can take anywhere between 30 mins to 45 mins, depending on the level of thickness. Grab a book, watch a movie, relax and let the mask do its thing. You’ll know it’s dry when you feel it tightening around you and it’s dry when you touch it.
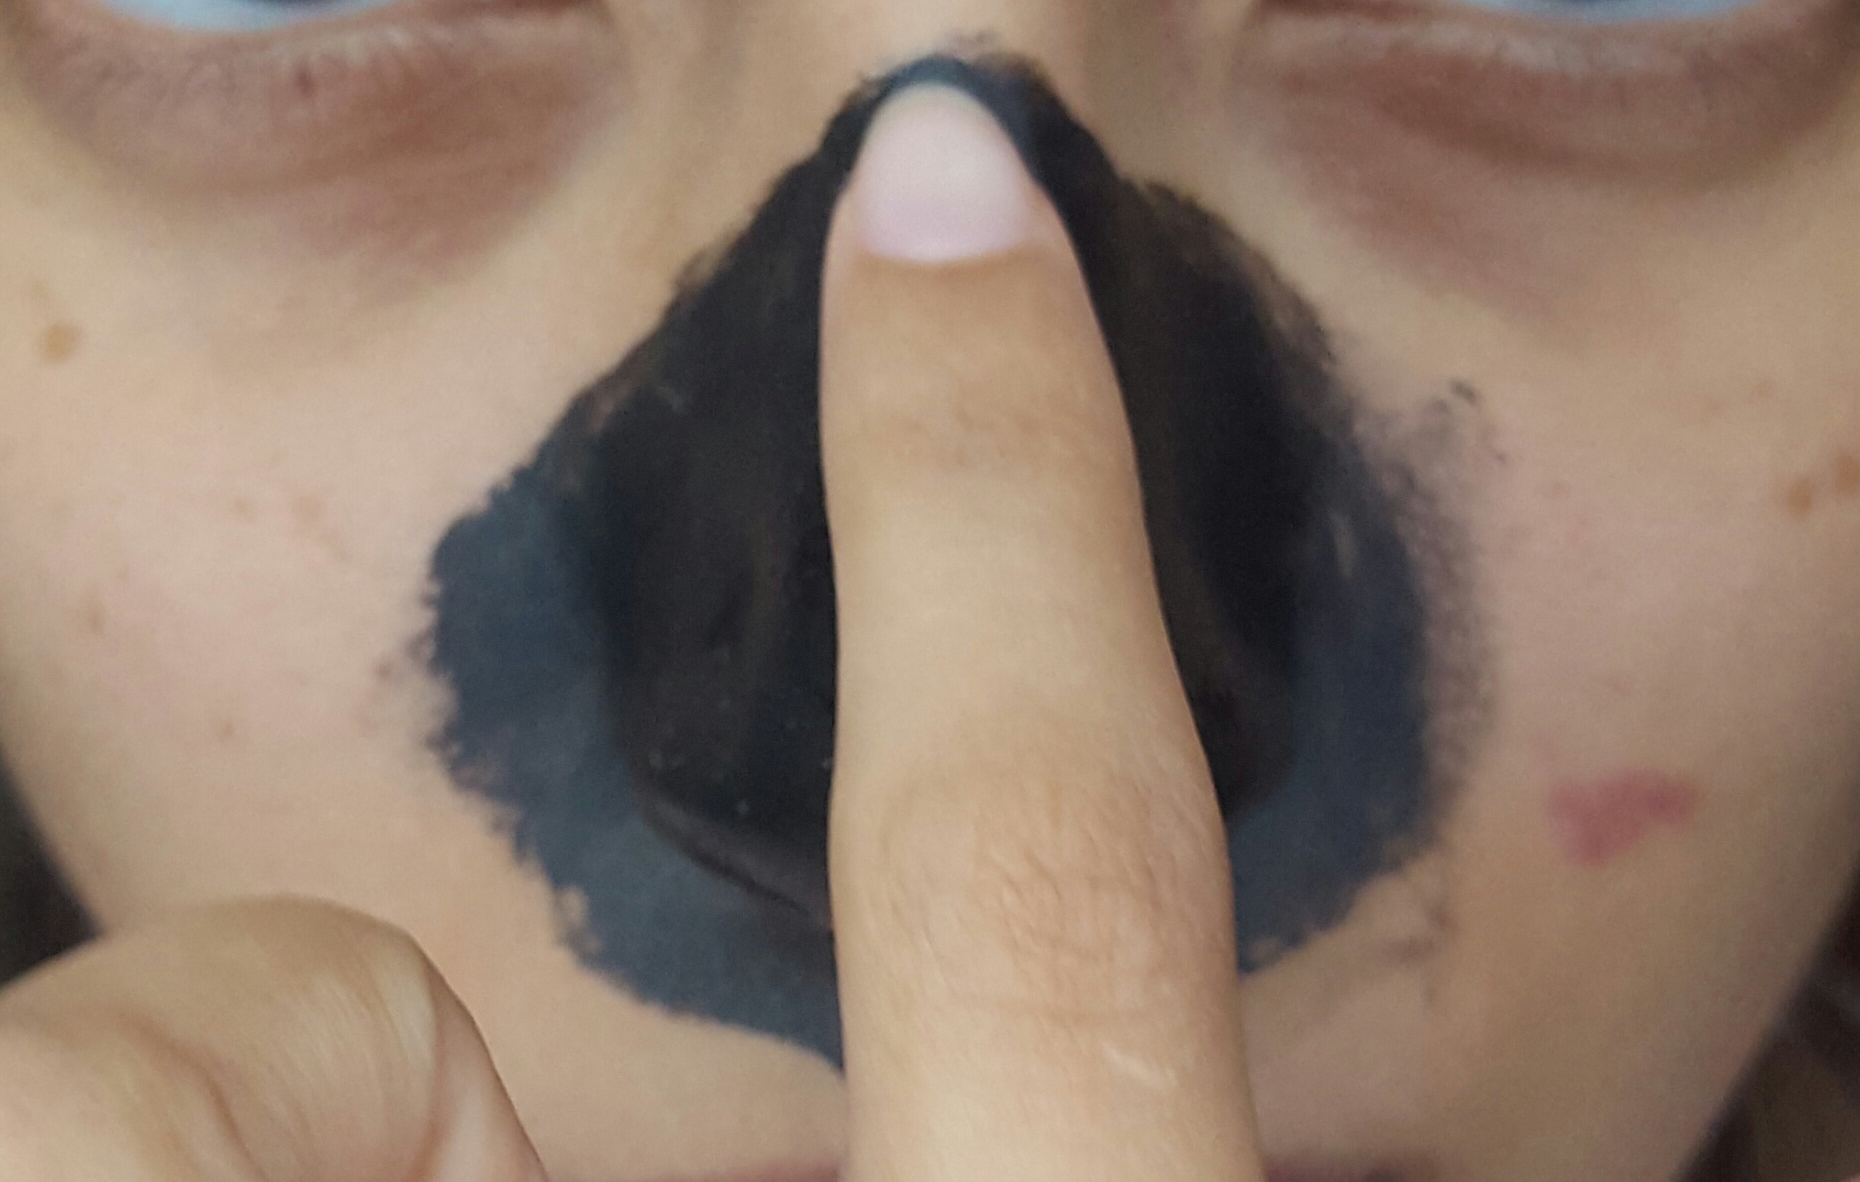
Step 5: Peel!


Always peel from bottom up, so that the action will lift out the blackheads from your pores. It might sting a little bit especially around the sensitive areas but the sight of the blackheads coming right out from your pores is such a satisfying feeling, you’ll want to keep going.
Step 6: Apply the bottle labelled “3″ – Skin Clarifying Pore Treatment Essence
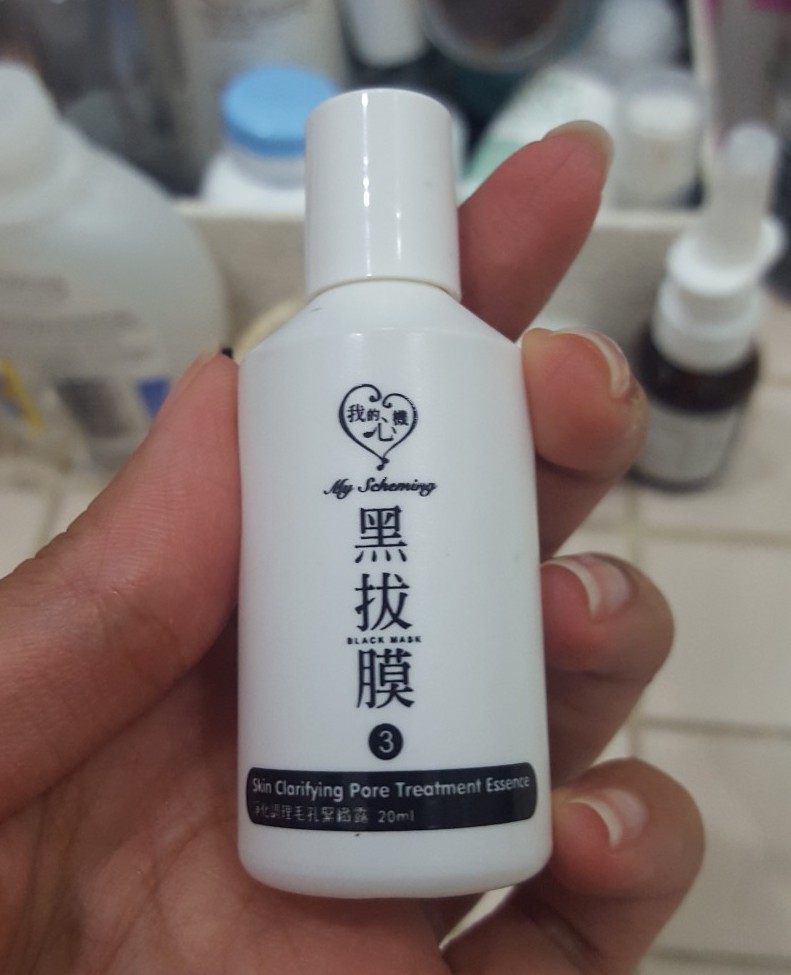
Most likely toner to help seal off your pores and enjoy the feel of smoother skin.
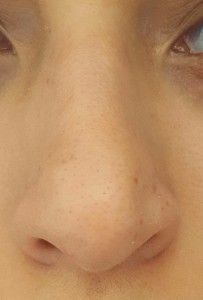
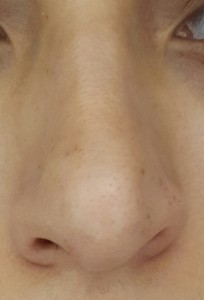
VOILA. The before (left) and after (right) shot.
I personally love this product. It’s simple enough to apply and does a really great job at pulling out the yucky stuff, and it’s affordable.
A little tip: This is great for upkeep and maintenance after a facial, but if you have a buildup of blackheads, this won’t do the trick.
Tell us what you think about the product if you have had any experience with it.
– Cover image: Hermo.my


